Table of Contents
- Why Consistent Clothing Sizing Matters for Your Brand
- Common Reasons for Sizing Inconsistency
- How to Measure Body for Clothing: A Step-by-Step Guide
- Clothing Size Chart Best Practices for Accurate Fits
- Vanity Sizing Explained: Why It Hurts Consistency
- Building a Size Standardization Process
- Conclusion: Consistency Builds Trust and Cuts Returns
- Frequently Asked Questions
Last Updated: September 7, 2026
The global plus-size clothing market alone is valued at USD 317.32 billion in 2026 (Mordor Intelligence plus-size market report), yet the apparel industry still struggles with a fundamental problem: inconsistent sizing. When a size medium fits differently across two brands, or even across two batches of the same garment, shoppers lose trust and brands lose revenue through returns. Consistent clothing sizing is the process of aligning garment measurements with standardized body measurements so that a labeled size delivers the same fit every time. Below, we'll show you exactly how to build a sizing system that holds up across every product you ship.
Why Consistent Clothing Sizing Matters for Your Brand
Fit consistency is a loyalty driver, not just a logistics metric. Research from Iowa State University's fit satisfaction study (2022) found that body shape and individual fit preference are the primary determinants of good garment fit, meaning shoppers judge your entire brand on how well one piece fits. A single inconsistent garment can push a customer toward a competitor permanently.
The financial stakes are equally clear. The 2026 State of Fashion survey from McKinsey & Company reports that 46% of industry respondents expect retail conditions to worsen this year, squeezing margins precisely when return costs climb. Every size discrepancy that triggers a return eats into that shrinking profit.
Common Reasons for Sizing Inconsistency
Most inconsistency stems from manufacturing and design decisions, not measurement errors. Pattern grading, the process of scaling a base pattern up and down for different sizes, introduces variance when proportional rules are applied inconsistently. Brands using different grading rules across product lines create size variance that confuses customers.
Relying on standard sizing charts is often insufficient because brands frequently use different grading rules, making it necessary for consumers to compare their specific body measurements against individual brand charts rather than relying on a "usual" size (My Green Closet sizing analysis, 2026). Fabric behavior compounds this. Technical fabrics with stretch behave differently than woven materials, so a garment cut identically in two fabrics will fit differently in practice.
How to Measure Body for Clothing: A Step-by-Step Guide
Accurate body measurements form the foundation of any size recommendation. Without reliable input data, even the best size chart fails. The difference between a recommendation that works and one that generates a return often comes down to measurement technique, not the size chart itself.
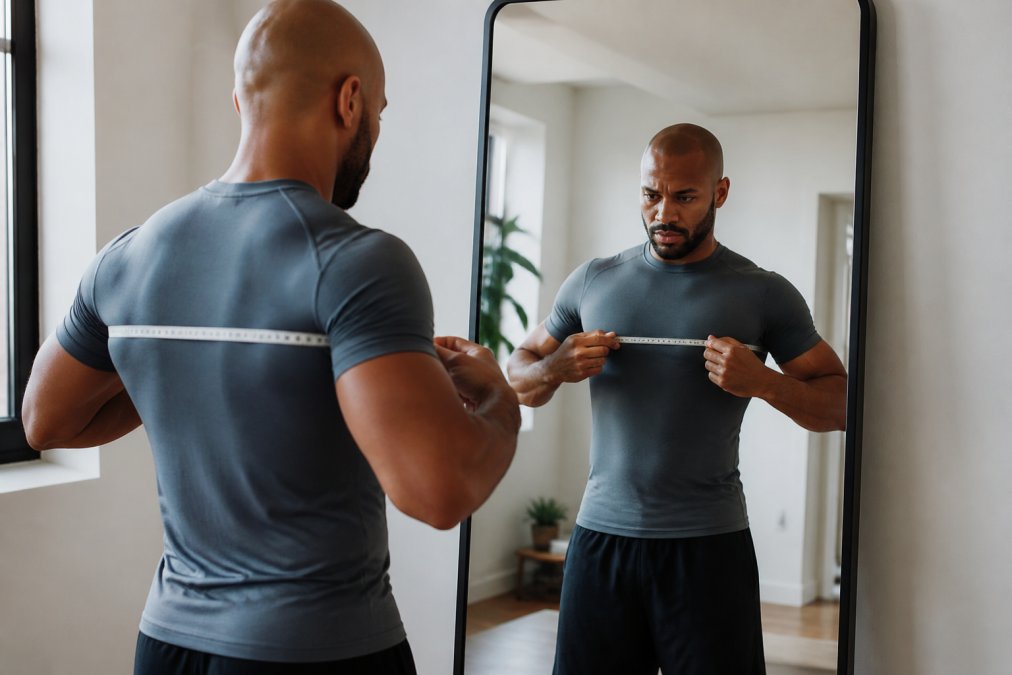
Pre-Measurement Preparation
Before the tape comes out, standardize the conditions. Measure against bare skin or form-fitting clothing, never over loose fabric, which adds 0.5 to 1.5 inches of false circumference. Stand naturally with feet shoulder-width apart. Have someone else take the measurements when possible; self-measurement introduces systematic errors, particularly for back width and shoulder measurements, because the tape angle shifts when you reach across your body.
The Seven Critical Measurement Points
-
Chest/Bust, Measure at the fullest part of the chest, keeping the tape parallel to the floor. For women, this typically aligns with the nipple line; for men, it sits slightly higher. Do not pull the tape tight, it should sit snug but allow one finger to slip underneath.
-
Natural Waist, Locate the narrowest point of the torso, usually 1 to 2 inches above the navel. This is the anatomical waist, not where pants typically sit. Many consumers measure at their pants waistband, which adds 1 to 3 inches and shifts the recommendation by one full size.
-
Hips, Measure at the widest point around the buttocks, keeping the tape parallel to the floor. A common error is measuring at the hip bone rather than the fullest part of the glutes, which understates the measurement by 1 to 2 inches on curvier body types.
-
Inseam, Measure from the crotch seam to the floor along the inside of the leg, standing straight with feet slightly apart. This is a garment measurement, not a body measurement, but it is essential for pant and legging sizing.
-
Shoulder Width, Measure from the edge of one shoulder bone to the other, across the back. This is the most frequently botched self-measurement because it requires the tape to sit flat across the upper back while your arms hang naturally.
-
Sleeve Length, Start at the shoulder bone, run the tape down the outside of the arm past the elbow to the wrist bone. The arm should hang relaxed, not bent.
-
Torso Length, Measure from the high point of the shoulder, down the front of the body, through the crotch, and up the back to the starting point. This measurement is critical for one-piece garments like bodysuits and unitards but is rarely included in consumer size guides.
Measurement Error Patterns to Watch For
Research using 3D body scan technology from PMC body scan clothing fit study (2025) demonstrates that measurement accuracy directly improves fit classification across diverse body forms. The same research identifies three recurring error patterns:
- Tape angle drift, The tape tilts downward on the back, adding up to 1 inch to chest and hip measurements.
- Compression bias, Pulling the tape tight to get a "smaller" number, which understates the measurement and leads to ordering a size too small.
- Posture variation, Measuring after a workout or at the end of the day when the body has naturally expanded by 0.5 to 1 inch.
Translating Measurements Into Size Decisions
For brands, collecting customer measurements through size guides and fit tools produces better outcomes than assuming a customer's labeled size transfers between products. The most effective size recommendation tools ask for 2 to 3 measurements, not all seven, because each additional input increases abandonment rates. Chest, waist, and hips capture the majority of fit variance for tops and bottoms; inseam and sleeve length matter only for specific categories.
When Measurements Conflict
A common scenario: a customer's chest measurement suggests size M, but their waist measurement suggests size S. For tops, prioritize the chest measurement and note that the waist will run slightly loose. For bottoms, prioritize the waist and hip measurement. Never average conflicting measurements, that produces a garment that fits nowhere correctly. Size charts should include a note explaining which measurement takes priority for each product category.
Clothing Size Chart Best Practices for Accurate Fits
A size chart only works when it distinguishes between product measurements and body measurements. Product measurements describe the garment laid flat, while body measurements describe the person wearing it. Confusing the two is the single most common error in size chart design.
Build your chart around body measurements with clear instructions on where to measure. Include the size tolerance for each point, typically 0.5 to 1 inch of ease depending on the garment's intended fit. Athletic wear requires particular attention here, since compression pieces fit tighter than relaxed training tops while both may carry the same size label.
Vanity Sizing Explained: Why It Hurts Consistency
Vanity sizing labels garments with smaller sizes than the measurements warrant to flatter customers. While it may boost short-term sales, it destroys consistent clothing sizing across your product line and the industry at large.
When one brand's size 8 equals another brand's size 6, customers cannot predict fit between labels. This forces them to rely on trial and error, increasing return rates and eroding trust. For athletic apparel, where performance depends on a secure, precise fit, vanity sizing is especially damaging. A compression garment that is actually too large will not provide the muscle support or moisture management the athlete expects.
Building a Size Standardization Process
Standardization begins with adopting established frameworks. Industry best practices for 2026 recommend using ASTM (American Society for Testing and Materials) standards to establish a consistent base size for apparel production (ASTM sizing framework discussion, 2026). These frameworks define body measurement ranges that anchor your size specifications. But adopting a standard on paper is not the same as executing it across a production line. The operational work happens in four phases.
Phase 1: Define Your Base Size and Grade Rules
Select one size as your anchor, typically size M or size 8, and build your entire size range around it. The base size should match your target customer's median measurements, not the industry default. A brand serving competitive swimmers will have a different median chest measurement than a brand serving recreational golfers, even if both use ASTM as their reference framework.
Once the base size is locked, document the grade rules: the incremental measurement changes between sizes. Common grading increments are:
- Chest: 1 to 2 inches per size, depending on the garment category
- Waist: 1 to 1.5 inches per size
- Hips: 1 to 2 inches per size
- Sleeve length: 0.25 to 0.5 inches per size
- Inseam: 0.5 to 1 inch per size
These increments are not universal. A brand using a 2-inch chest grade will produce a different size range than one using a 1-inch grade, even if both start from the same base size. The grade rule must be documented per product category and per fabric type, because stretch fabrics require smaller grade increments than woven fabrics to achieve the same visual proportion across sizes.
Phase 2: Fit Model Selection and Validation
A fit model is not simply someone who wears the sample size. The fit model's measurements must match your base size specifications within a tight tolerance, typically within 0.25 inches for critical points like chest and waist. Most brands make the mistake of using a fit model who is simply "average" rather than one who precisely matches the documented base size, introducing systematic error into every pattern developed from that model.
For inclusive sizing programs, use multiple fit models across the size range. A pattern that grades cleanly from size M to size L may break down by size 2XL because the grade increments compound. Testing on a single fit model at the base size does not catch these failures. Brands with inclusive lines typically fit-test at three points: the base size, the largest size, and one size near the middle of the range.
Phase 3: Production Measurement Audits
Measuring finished garments against product specifications before shipping is the quality control checkpoint that catches batch-to-batch variance. The audit protocol should specify:
- Sample size: Measure at least 5 garments per production lot, not just the first one off the line
- Measurement points: Chest, waist, hip, sleeve length, and total length, the same points used in your size chart
- Tolerance: Acceptable deviation is typically 0.5 inches for body measurements and 0.25 inches for length measurements
- Documentation: Record measurements in a shared spreadsheet or PLM system so trends across production runs are visible
A single garment out of tolerance is a quality issue. Three garments out of tolerance in the same direction indicates a pattern or grading problem that will recur until the root cause is fixed.
Phase 4: Return Data as a Diagnostic Tool
Track return reasons by size and style to identify recurring discrepancies. The pattern of returns tells you where your sizing system is failing:
- Returns concentrated in one size, The grade rule for that size is likely incorrect
- Returns spread across all sizes for one style, The base pattern or fabric behavior is the problem
- Returns citing "too small" in a stretch fabric, The size chart does not account for fabric recovery or negative ease
The Digital Twin Opportunity
Retailers are increasingly using digital twin technology to unify fragmented fit data across platforms and improve sizing accuracy (Bold Metrics sizing data guidance, 2026). This approach centralizes fit information so that every channel, from your website to marketplaces, presents the same size guidance. Digital twins also enable virtual fit testing across a broader range of body shapes than physical fit models can cover, which is particularly valuable for inclusive sizing programs.
A Unique Angle: Sustainability Through Standardization
Most sizing guides stop at return reduction, but the sustainability case is equally compelling. The apparel industry's return rate averages 20-40% for online purchases, and each return generates roughly 2.5 kg of carbon emissions from reverse logistics alone, before accounting for repackaging, restocking, or the 15-20% of returned garments that end up in landfills because they cannot be resold. Standardized sizing that reduces return rates by even 5 percentage points cuts a brand's logistics carbon footprint proportionally, positioning sizing consistency not as a cost center but as a measurable sustainability initiative that resonates with environmentally conscious consumers.
Conclusion: Consistency Builds Trust and Cuts Returns
Sizing inconsistency is solvable, but only with a deliberate process that combines accurate body measurement collection, clear size charts, and standardized manufacturing frameworks. The brands that master this earn customer loyalty and protect their margins from avoidable returns.
Our apparel is crafted with consistent sizing so you can order with confidence, and free returns within the U.S. cover you if a fit ever misses the mark. Get started with Greatness Wins and experience athletic wear engineered for your pursuit of greatness.
Frequently Asked Questions
Why is clothing sizing so inconsistent across brands?
Sizing inconsistency happens because each brand uses its own fit model and grading rules. There is no universal standard enforced across the industry. A size medium from one label might match a large from another. Even brands using ASTM frameworks often apply different tolerances. This is why comparing your body measurements to each brand's specific size chart is more reliable than trusting the letter on the tag.
What is the difference between body measurements and product measurements?
Body measurements are taken directly from the person, like your chest or waist circumference. Product measurements are taken from the garment itself, laid flat. Both matter for consistent clothing sizing. Your body measurements tell you which size to select on a chart. Product measurements tell you if that garment will actually fit when you receive it, accounting for fabric stretch and cut.
How do I measure myself accurately for athletic apparel?
Use a flexible measuring tape and wear minimal, form-fitting clothing. Measure your chest at the fullest part, your waist at its narrowest point, and your hips at the widest point. Keep the tape snug but not tight against your skin. For inseam, measure from the crotch seam down the inside of the leg. Compare these numbers to the brand's size chart, not your usual size.
How can brands maintain consistent sizing across different fabric types?
Brands must account for fabric stretch and recovery when setting size specifications. A woven fabric with no stretch needs more ease than a knit with four-way stretch. Use the same fit model and grading rules for every style, but adjust the base pattern for each fabric's properties. Document these adjustments and communicate them clearly on the product page to manage customer expectations.
Shop the collection at Greatness Wins and find your perfect fit today.